Feb 27, 2012


Every other month on the 4th Monday we will provide you with a specific set of #s. These numbers will correspond with the numbers on templates in your KLD DT sets. Use any of your Designer Templates that have that number on them to design a page, card, or project.
We look forward to seeing how each of you will be inspired to come up with different layout combinations using the Designer Template #’s as your guide.
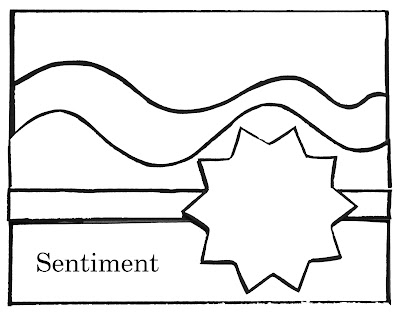
Design by Numbers - using #1
This first month we've chosen the number 1. You can use any #1 from any DT set you have or can get your hands on...and see what you can come up with! For the borders, you can use both the 1a and 1b. For all the other sets, just use the #1 from the set. And you can use any of the photos, mini photos or photo mats...the number doesn't matter on those. Here's what I was able to design with my #1 templates!
Two Cute - designed by Debbie Budge using My Mind's Eye Miss Caroline paper and the following designer templates: Clara Lane 1a1b, Cascade Trails 1a1b, Happy Trails 1a1b, Scallops 1a1b, Tiny Floral 1T, Bracket 1, Tiny Bracket 1T, Tiny Accent 1T, Tiny Nature 1T, Rings 1, 1" Strip, Photos


Be sure to share your layouts, cards or projects with us for a chance to win! Post your entries on our facebook page under the Design by Numbers tab on the left and you will automatically be entered to win! A Random Winner will be chosen from those who participate. The Winner will be announced on Facebook one week after each Challenge begins.

Feb 24, 2012

Weekend Whimsy Wreath


Burlap Wreath Directions:Wrap the wreath with burlap, hot glue as you go.
Once the wreath covered,use your designer Templates to create the flowers. Once that is done hot glue them and any other embellishments you would like to add to the wreath.


If you want to add a letter like I did, simply mod podge paper to the top
and use an emery board to sand the edges.

Basic Flower: Begin by tracing the template that you would like to use. Once
you have cut the shape out, cut the entire shape into a swirl like you see
above.


Pinch and fold the flower from the inside/middle of shape, hot gluing as you go to create the flower you would like.

Bracket Flower: Tiny Sweetheart Bracket - Once you have traced and cut the piece, fold and hot glue until you have created the above petal. Make 3 and then hot glue together. Add a center to finish the look.
Give your leaves some dimension by slitting the stem and folding it over.
To create a more ruffled flower, cut a circle out using the Rings Acc. Set. Then Starting in the middle, fold and hot glue as you go along. Make sure to start this one at the outside edge of the center of the shape you have cut.

Feb 22, 2012

Ideas to Inspire-Bee


Lacey was a little Bee this past Halloween, and since she was so cute in her costume I really wanted to highlight these pictures with a page of its own. To help really set the mood I made a little bumble bee of my own using the TINY SHAPES! I am constantly amazed how much those shapes inspire me. There is not a page that i scrapbook lately that does not include the TINY SHAPES set on it. Designed by Susan Budge using a variety of scrap paper.


Feb 20, 2012

New paper Kit


 Forgot to post this Friday, but we have a new paper kit in the shop! Here are a few samples of what you can create with the new " What I Like About You" Kit. MME paper line. You can get the paper kits on our website at kiwilane.com. Look in the store under paper kits. 

February DT Doodle

Use the following sketches to to create you own page/card. *Note, that the accessories don't need to be the same accessories, the borders don't need to be the same borders, etc. The page/card should just be based on the sketch and you add in your own creativity.
Layout Sketch
Card Sketch

Feb 18, 2012

President's Day Sale

ONE day SALE!
February 20th
35% off on select DT sets
no rain-checks, while supplies last

Feb 15, 2012

Sincerely

Cards Created by Gail
Sweet Little One: 5 1/2" x 5 1/2" card base; I used tiny accents, tiny floral and mini scallops; supplies not in kit: doily, stick pins (Fancy Pants), ribbon & paper (My Mind's Eye), 1 1/2" scallop circle paper punch, brad (Basic Grey), paper flower (Making Memories), ink. I wanted that distressed feel for this card, with a touch of girly-ness. To get my distressed look I used a distressing tool (can be purchased from Kiwi Lane's shop) around the edges of all the paper pieces, taking some larger pieces out to add to the look. Then I went over the distressed edges with distress ink (antique photo, of course!) I added foam adhesive behind the yellow flower so I could easily add the stick pins.Smile: 4 1/4" x 5 1/2" card base; I used tiny sweetheart, tiny accents, tiny strips, nature, tiny nature, My Minds Eye paper, 1 1/2" circle punch, tissue paper, brad, ink.*To make the tissue
flower center: punch 6 circles from white tissue paper(fold the tissue to get enough layers to get a clean punch). Fold 4 tissue circles in fourths. Adhere two flat tissue circles together so they are stacked. Adhere the four folded circles to the layered circles, lining up edges to make one circle. Add brad to center of flower, covering where the four corners meet. Ink the edges of the tissue.

Hello sunshine - 4 1/4" x 5 1/2"; Templates: Tiny Nature, Tiny Shapes (flower Center), Tiny Strips, Thoughtful, Tiny Brackets. Ribbon & paper by My Mind's Eye, stamp, distress ink, brad.

Feb 13, 2012

Picture Perfect Challenge 2


Love is in the air

Picture Perfect: February = Table for 2
The Challenge: Test your matchmaking skills!
Design the Perfect layout for just TWO Photos. When you are done, post your picture on facebook under mine in the picture perfect category tab! You have until Monday Feb 20th to upload your layout to be entered into the drawing to win a $25.00 gift certificate to kiwilane.com. The winner of this month’s giveaway will be chosen on Tuesday Feb 21st and posted on facebook. Make sure to read all the details above for the category.

Here is my Picture Perfect Layout for TWO. David and i just celebrated our 10 year anniversary back in December. It was nice to highlight that achievement with a layout of its own.

I really love using the Mini borders on one page layouts. This time I used the same Mini border from Mini Madison Ave (2A) with the same 12" border from the 12" Madison Ave set(2A). I just layered them on top of each other. I think I am going to do this again on another layout. =)
DT sets used: Sweetheart, Mini Madison Ave, Madison Ave, Tiny Sweetheart, tiny Accents, Tiny Shapes. MME Paper. Love Me

I wanted a bracket mat for my pictures. So using the bracket from the Sweetheart set I just traced it once unto my paper and then slid it over and traced it again. Then cut the two out together so that it was one piece!

And also joining me, bringing you ideas each month that will hopefully inspire you for the Picture Perfect Challenge is Kristy Lee.....
Hey everyone! Kristy Lee here. I'm so excited to be a part of the Kiwi Lane Design Team as the Kiwi Lane Designer Templates have truly re-kindled my love of scrapping. I'm also crazy excited to be bringing to you each month the Picture Perfect challenge.
Being as tomorrow is Valentines Day I decided it would be fun to throw a little love layout together. My sweet husband made me the cutest Valentine last year (complete with murmuring while creating the project, and a huge endorsement of how much work it is to create). I thought it would be fun to create a layout about my "photo booth" so that I can always remember how sweet this Valentines Day was to me.
DT Sets used: Sweetheart 2 , Mini Scallops 1A, 3A, Bracket 1, Cascade Trails 1A

I am always looking for fun ways to use my Designer Templates so I took the mini scallop and created a panel ruffle beneath my photos.

Of course my definite go-to are the brackets. They make creating a hand journaling block such a breeze!

And lastly how could I ignore using the adorable Sweetheart template to finish off my layout to perfection.

I can't wait to see what your interpretations of a two photo layout will be!
- Kristy

Design Team


We are super excited to have Jennifer and Jen as part of our Design Team! Here is a little about them. 

Born and raised in Las Vegas, NV. I met, fell in love with, & married my amazing husband in October 2004.  We have an awesome 2-year old son Noah who’s photos are basically 80% of what I scrap.  I literally married into the now Kiwi Family.  WHICH IS AWESOME!  (Debbie’s my mother-in-law and Susan & Shiloh my sister-in-laws) 

I’ve always envied their scrapbooking styles over the years but really evolved my scrapbooking and began loving my pages when they created the designer templates.  I now travel around with them to the scrapbook expo’s across the country so I might see you at one this year. 


I have been married for almost 9 years, have two beautiful girls ages 6 and 3. I have been scrapbooking and crafting for over 14 years and love it. I am always thinking of new ways to change a look of a craft or scrapbook page or even a card.
With Kiwi Lane DT it has given me a whole new thought process to use on my layouts, crafts and cards. Made it easy and fast which has been a heaven to me. Being able to set up a layout without cutting a single paper has saved alot of paper for me, WOW the money SAVED. The dimension you can use the templates for are endless and I enjoy creating new things everytime and they are so easy to take to a CROP or friends to scrapbook.
You can find my blog at:craftingmoments.wordpress.com.


Design Team

We are really looking forward to seeing what Kristy Lee designs each month for the Picture Perfect Challenge.
I am sure she will inspire you just like she does us!
Here is a little about her.

I am a somewhat frantic (okay, mostly frantic) and busy work at home mom to 5 wonderful children (including teen girls which don't be fooled, are AMAZING) and a wife to my "bebe" of nearly 20 years. I scrap. It's what I do! (Amongst photography, laundry, cooking, cleaning, refereeing, taxi service, running, errands...you get the idea). So if you ever bump into me and I'm wearing two different shoes, or have forgotten my mascara, or have even misplaced a child, you'll understand. :) I look forward to inspiring you one "Picture Perfect" layout at a time.


Design Team

We are really excited to have Gail part of our Design Team this year! I think you are going to enjoy seeing what she designs the 3rd Wednesday of each month for the "Sentiment" category. Welcome Gail!
Gail is addicted to paper and paper crafting and loves to have what she calls "paper therapy" every day, if possible. She is also a SAHM of two kids who keep her on her toes and a self-proclaimed Gilmore Geek (meaning that she watches/listens to "Gilmore Girls" every chance she gets, including paper therapy sessions!)


Feb 8, 2012

Chocolate Chip Oat Cookies


This is one of my favorite cookie recipes. The recipe makes a lot so you can either half it or I usually freeze half so when I need a sugar fix it is easy to cook some up.

cream together the following ingredients
3 cups brown sugar
2 cups sugar
2 cups margarine
2 cups shortening
2 tbs vanilla
4 eggs

blend together the following ingredients:
7 cups flour
1 cups otameal
4 tsp soda
2 tsp salt
2 pkg of choc chips.....
1 pkg white chocolate chips; 1 pkg chocolate chips
nuts optional

Combine all the ingredients together and mix.
Bake on a un-greased cookie sheet
375 degrees 8-10 minutes

Feb 6, 2012

February


February's Calendar topper is all about.....LOVE!
I LOVE how my calendar is turning out. I LOVE that I'm actually getting a calendar done this year! And...I LOVE the pictures on this calendar. They are of my daughter, Sarah, and her husband, Jake...and you can just see the LOVE they have for each other.


I used We R Memory Keepers paper and the following templates to make this month's calendar:

Madison Avenue 3a, Abbie Road 1b, Scallops 1a, Strips, Tiny Wildflower 1T and 4T, Nature 1, Sweetheart 1 and 2, Tiny Sweetheart 2T and 4T.


I wanted to join the hearts together, just as Sarah and Jake did when they got married. So I put an eyelet in the middle of each heart and tied them together with ribbon strung with a tiny lock and key. I LOVE how it turned out!


I hope you'll take some time this month to create your own February Calendar page...and that you'll share it with us on our Facebook page! We would LOVE to see what you come up with!

Designed by Debbie Budge


Feb 3, 2012

How do we capture emotion in a photograph?


Well, first we have to find a moment. Snapping a posed image of your pet or your kids will get you a nice picture, but if you try a little bit harder and take your time getting a more candid photograph then you may end up with something much more special.
Here are a few things you can try to add more emotion to your photos.
Be in the moment:
Feel the emotion you’re trying to capture.
Be patient:
Wait for the right moment to snap a picture.
Quit Saying "Smile":
To capture emotion you need to keep it candid. Some of the most magical moments are the ones that are unexpected. Take your shots when your subject is relaxed and may not even be aware you are photographing them.
Get Close:
Don't be afraid to get close to the subject that you are photographing. Often a singular emotion gets lost in a busy scene. Try simplifying the main subject of the image before snapping a picture. You can also try placing yourself in a position that does not intrude upon the moment and use your zoom to capture it.
Think outside the box:
Don't be afraid to get off angles, cut off heads, miss focus a bit. Sometimes images like these can be very thought provoking and mysterious.Get up close and personal with your loved ones!
Snapshot Suggestion: Life is about the small things, the moments that make us happy...or sad. Capture at least 1 picture this month that shows an emotion.